Soot Yourself: Channel Your Inner-Dick Van Dyke and be Your Own Chimney Sweep
The sights, smells and sounds of a fireplace can make it a focal point of comfort and ambiance in your home. However, using a fireplace that’s not properly maintained can have devastating consequences for your health and home.
This May Also Interest You: Wood-Burning Stove and Fireplace Safety Guide
The most common byproducts of burning wood are soot (a black or dark brown powder) and creosote (a black or brown tar-like residue). Both are flammable and can lead to serious health complications with prolonged inhalation exposure. While the primary concern with soot is its powdery consistency that can become airborne and inhaled, creosote can catch fire shockingly easily.
According to the Chimney Safety Institute of America: “Creosote can ignite at temperatures as low as 451 degrees Fahrenheit [232.8 degrees Celsius] (for context, a fire in your fireplace can burn in excess of 450 degrees Fahrenheit [232.2 degrees Celsius],) And even just a 1/8-inch buildup of creosote is considered enough to cause a chimney fire.” Then, once the fire has started in your chimney, it can crack the flue liner and allow the fire to spread into your home’s walls and attic, resulting in a full-blown house fire.
To prevent these risks, cleaning your chimney on a regular basis is essential. While you can hire a professional chimney sweep to do it for you, you can save some money by cleaning the chimney yourself.
Can You Clean a Chimney Yourself?
Chimney cleaning is often done on the roof through the top of the chimney, and working on a roof has inherent safety risks. If you have a particularly steep roof, have a roof made of a slippery material (like metal), or you’re uncomfortable working on your roof, you should hire a professional to clean your chimney. Alternatively, you may be able to clean your chimney from the bottom of your fireplace if the firebox is large enough for you to fit inside. The main disadvantage of working from the bottom is that it’s usually much messier since soot and creosote are likely to fall on you as you work.
In addition, you should only attempt to clean your chimney if the smoke chamber (located directly above the damper between the firebox and the flue) and smoke shelf (the flat surface located between the flue and smoke chamber) are readily accessible with a brush. Since those two areas are where the majority of creosote collects, professional help will be required if you can’t reach them yourself.
Finally, if you encounter any of the following conditions while cleaning your chimney, stop what you’re doing and call a professional:
- You see Stage 2 (flaky) or Stage 3 (glazed) creosote that requires special chemicals to clean.
- You feel or see cracks inside your chimney, which can pose a significant fire hazard and needs to be professionally repaired.
- You see pieces of tile in your firebox that can indicate a cracked liner and pose a significant fire hazard.
Even if you decide to clean the chimney yourself, you should still have your chimney inspected by a professional chimney sweep on an annual basis. They will be able to assess the overall condition of your chimney and spot any damage or deterioration that needs to be addressed.
How Often Should You Clean Your Fireplace and Chimney?
You should clean your fireplace and chimney a minimum of once a year, by early fall at the latest. The best time to clean your chimney is usually late summer when your roof will be dry, and temperatures will be mild.
Aside from an annual cleaning, you should clean your chimney whenever creosote buildup is more than 1/8 inch thick. You can use a fireplace poker or metal scraper to scrape the creosote buildup inside your firebox and flue liner to determine its thickness. And if you regularly burn unseasoned (“green”) wood or artificial logs, it’s recommended to clean your chimney after every 50 burns.
More Related Articles:
- How Much Does a Gas Fireplace Cost?
- How to Light a Gas Fireplace: A Step-by-Step Guide
- Ventless Gas Fireplaces: Pros and Cons You Should Take to ‘Hearth’ Before Installing One
- How Much Does Chimney Repair and Removal Cost?
- How Does a Pellet Stove Work?
How to Clean a Chimney: 4 Steps
Before You Begin
Chimney flues are made with different dimensions and materials, so the first step to cleaning your chimney is purchasing the right type of chimney brush for your specific flue liner.
Measure the width of your flue and purchase a brush that’s roughly 1/2 inch wider. Choose one made with plastic bristles for metal flue liners and metal bristles for clay flue liners. Next, measure the height of your chimney and purchase enough extension rods (available in 4-, 5- and 6-foot lengths) to span the entire chimney, ensuring that the rods are compatible with the brush.
If you’ll be working from the ground inside your chimney, wear personal protective equipment like disposable coveralls, safety glasses and a dust mask or respirator to protect your clothes, lungs and eyes from falling material. If you’ll be working from the roof, you should only need a face mask or respirator while you’re cleaning the flue liner, but you should don protective coveralls and safety glasses when you clean the smoke chamber and shelf.
Things You’ll Need
- Personal protective equipment
- Flashlight
- Chimney brush
- Extension rods
- Shop vacuum
- Drop cloth, tarp or plastic sheeting
- Duct tape
- Wire brush or long, bendable brush
- Shovel, broom and dustpan
- Extension ladder (if necessary)
- Cordless drill (if necessary)
Step 1: Prepare Your Fireplace
Open the damper, then remove the grate and any logs or ash inside the firebox. Place a tarp or heavy-duty plastic sheeting on the floor around the hearth, and use duct tape to secure plastic sheeting over the fireplace opening to protect your room from the soot and creosote that will come out of the flue.
Place a hose from a shop vacuum inside the firebox and seal any gaps or openings in the plastic with duct tape. Place the shop vacuum outside and attach enough hose extensions to reach from the fireplace to the vacuum, then close the door around the vacuum. You’ll be running the vacuum as you clean the flue to collect the dust that’s produced, but some of that material may get ejected out of the vacuum’s exhaust port. Keeping the vacuum outside prevents that dust from getting inside your home.
Step 2: Brush the Flue
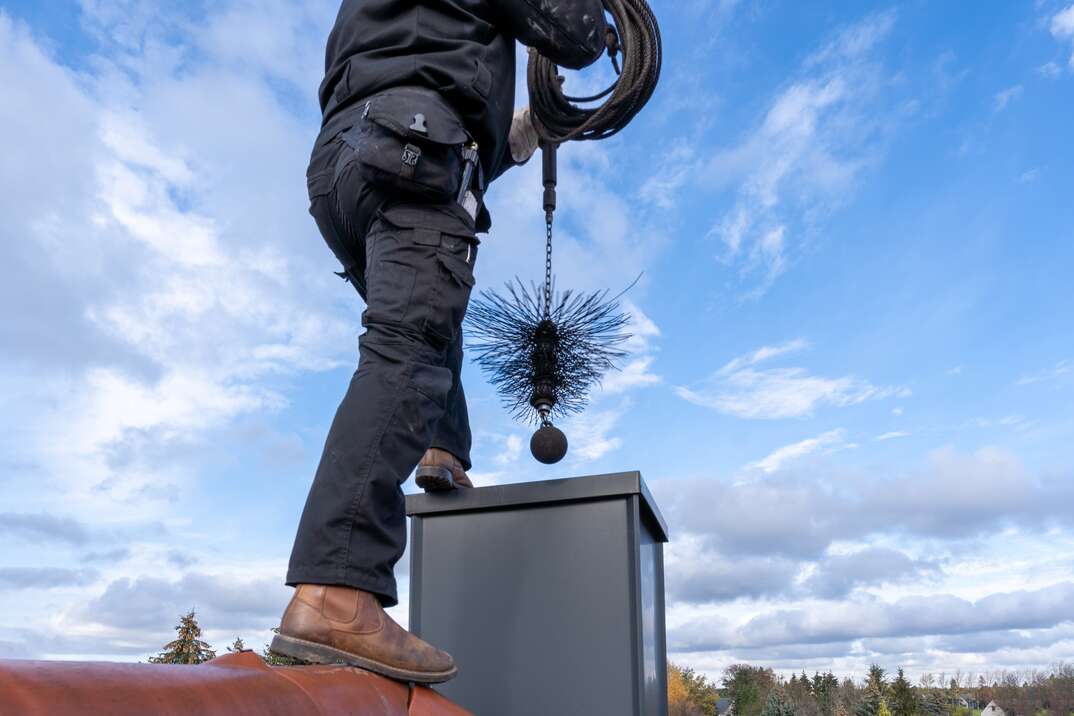
Turn the vacuum on. If you’ll be cleaning the chimney from your roof, use an extension ladder to climb onto your roof with a chimney brush, extension rods and cordless drill. Use the cordless drill to remove the screws securing the rain cap or animal guard to the top of the chimney, then set it aside.
Regardless of whether you’re cleaning from the ground or roof, attach an extension rod to the end of your brush and insert it into the flue. Use an up-and-down motion to scrub the inner walls of the flue. Continue scrubbing until you reach the end of the extension rod, then attach another.
Continue this process until you either reach the smoke chamber (if working from the roof) or the top of the chimney (working from the ground). Remove the brush while disassembling the extension rods as you go. After the brush is completely removed, inspect the flue with a flashlight to verify that it’s sufficiently clean.
Step 3: Clean the Smoke Chamber and Shelf
If necessary, climb down off your roof and move to the fireplace inside your home. Pull back a small section of the plastic cover and go inside the firebox.
From inside the firebox, use your chimney brush to clean the smoke chamber, and either a wire brush or a long, bendable brush to clean the smoke shelf.
Step 4: Clean Up Your Space
Use a shovel, broom and vacuum to clean up the dust and debris in the firebox and on the smoke shelf. Fold up the tarps and plastic sheeting and take them outside to be shaken off. The collected creosote and soot can be disposed of with your regular trash in most areas, but some jurisdictions require special disposal practices. Refer to your local regulations to determine how to properly dispose of creosote in your area.