Follow us
How to Make Your Sliding Glass Door Slide Easier: 7 Steps to Smooth Operation
By James Fitzgerald
October 13, 2021
HomeServe photo by Matt Schmitz
Unsticking a Sliding Glass Door at a Glance
Tools & Materials: Stiff bristle brush, silicone-based lubricant, vacuum, screwdriver, prying tool, pliers, hammer, block of wood, cleaning solution, rag, saw horses
Step 1: Clean tracks
Step 2: Fix bent tracks
Step 3: Apply lubricant
Step 4: Adjust rollers
Step 5: Remove door
Step 6: Clean or replace rollers
Step 7: Reinstall door
Fixing a sticky sliding glass door is one of those projects that’s easy to, well, let slide. After all, if it still works, why fix it? However, playing tug-of-war every time you go to open your door can get old, and you’ve finally decided that enough is enough.
This May Also Interest You: Got a Sagging or Sticking Door? Here Are 8 Fixes to Try
Fortunately, unsticking a sliding door can be done quickly and easily, unless underlying structural issues are to blame. Read on to learn how to make a sliding door slide easier, and discover when you may need to call in a pro.
Why’s My Sliding Door So Hard to Open?
There are two main parts of a sliding glass door that makes it slide: the rollers and the tracks. The rollers are small wheels attached to the outside corners of the door and are guided along a metal track on the bottom or top of the door jamb. Larger sliding doors may have rollers on both the top and bottom of the jamb, but most residential doors only have rollers on the bottom. Dirt, damage or misalignment in either of these components can hinder the smooth operation of your sliding door.
Things You’ll Need
Stiff bristle brush (toothbrush, small grout brush or wire brush)
Silicone-based lubricant
Vacuum
Screwdriver
Prying tool (flat-head screwdriver, butter-knife, small pry bar, etc.)
Pliers
Hammer and small block of wood
Cleaning solution (general purpose cleaner, white vinegar, etc.)
Cleaning rag
Sawhorses (optional)
How to Make a Sliding Glass Door Slide Easier
Step 1: Clean the Tracks
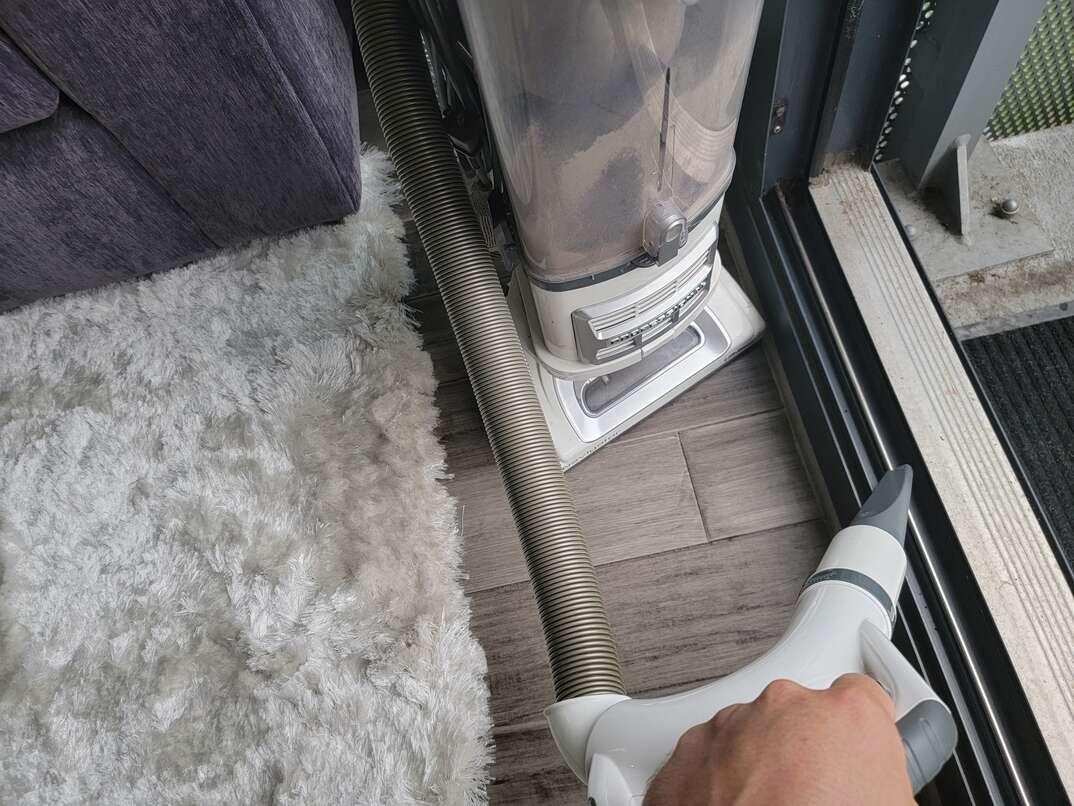
HomeServe photo by Matt Schmitz
The tracks of your sliding glass door can accumulate dirt and debris over time, which can obstruct the operation of the rollers and make the door difficult to slide.
Use a vacuum to suck up any heavy and loose dirt and debris. Then, thoroughly scrub the track with a stiff bristle brush to clean off the remaining dirt and grime, while periodically sliding the door back and forth to expose the full length of the track. For really caked-on dirt, you can apply a cleaning solution to the tracks or brush as you scrub. Wipe off any residual cleaning solution with a rag and suck up any leftover dirt with your vacuum.
Step 2: Fix Bent or Damaged Tracks
Along with dirt, bent and damaged sections of the track can hinder the performance of the rollers. Tracks with inward bends will pinch and grab the door as it slides along the track, while outward bends can throw the rollers out of alignment and possibly derail them.
Visually inspect your track for any bends and slide your door back and forth to identify isolated areas where your door has difficulty sliding past. You can usually fix minor bends with a pair of pliers or a hammer and block of wood, but major bends might require the track to be professionally repaired or fully replaced.
Step 3: Lubricate the Tracks

HomeServe photo by Matt Schmitz
Spread a silicone-based lubricant evenly and thoroughly across the track while working it in by sliding the door back and forth. This can aid in reducing friction along the track and help it to slide easier.
Using a silicone-based lubricant is important since it won’t gum up over time or accumulate dirt and debris like petroleum-based lubricants will.
More Related Articles:
Bifold and Your Billfold: How Much Does it Cost to Install Bifold Patio Doors?
Should You Repair or Replace a Screen Door? Repair Vs. Replacement Costs
How to Install or Replace a Door Frame: An Open-and-Shut Guide
How to Install a Storm Door: Your 5-Step Instructional Guide
Step 4: Adjust the Rollers
The roller wheels are designed with adjustable heights so they can remain aligned on the track. Over time and normal wear and tear, the rollers can get thrown out of alignment, which can hinder their performance.
Most sliding glass doors have adjustment screws located on the side of the door next to the rollers. Most of the time, these screws will be concealed with plastic plugs that can be easily removed with a small prying tool. Once exposed, use a screwdriver to turn the adjustment screws clockwise to raise the rollers and counterclockwise to lower them. Adjust the rollers on both sides of the door to ensure evenness and test the door after each adjustment. If the screws are difficult to turn, you can apply some of your silicone lubricant on and around the screws.
Step 5: Remove the Door
If the above methods fail to unstick your door, it’s possible the rollers are dirty, broken or damaged. Unfortunately, the only way to repair these issues is to remove the entire door. Doing so will also be necessary if you discover your tracks are damaged beyond repair.
Sliding doors are heavy, fragile and expensive, so removing them requires careful handling by at least two people. Start by fully opening the door, then lifting it up and out of its track. Depending on the door, you may also have to remove some stop molding from the jamb with a hammer and prying tool. Carefully lay the door onto a set of sawhorses, preferably with padding or cushioning — like moving blankets — between the sawhorses and the door to protect the glass.
If you’re uncomfortable performing this step yourself, consider hiring a professional to do it for you.
Step 6: Clean or Replace the Rollers
Once the door is removed, check to see if the rollers are dirty, damaged or broken. If so, remove the rollers by either prying them out or removing the screws securing them to the door.
If they’re dirty but not damaged or broken, clean them off with water or a cleaning solution and a bristle brush. Once they’re dry, apply lubricant around all the moving parts and reinstall them.
If they’re damaged or broken, purchase replacement rollers and install them onto the door according to the manufacturer’s instructions.
Step 7: Reinstall the Door
Once the rollers are back in place, reinstall the door by reversing the steps you took to remove it. Adjust the rollers and check to see if your door is easier to slide. If not, there may be underlying structural issues — like a sagging wall — that are causing the problem. If you suspect that’s the case, hire a professional contractor to inspect the wall and make any necessary repairs.
View Plans in Your Area
Follow us
Popular


Apr 01, 2024

Apr 26, 2021
Get the latest news, tips and promotional messages, including special offers.