Follow us
How to Winterize Your Windows
By James Fitzgerald
November 24, 2022
Your windows have a greater impact on your winter heating bills than you might realize. According to the U.S. Energy Department, heat loss through windows accounts for 25% to 30% of residential heating use. Consequently, winterizing your windows to seal off drafts and improve their insulation value is key for optimizing your home’s energy efficiency.
This May Also Interest You: Don’t Cry! Here’s How to Clean your Windows’ Weep Holes
Read on to learn how to winterize your windows. This will help you and your family stay warm and toasty this winter while saving money month after month.
Winterizing Your Windows
Things You’ll Need
Putty knife or beveled scraper
Scrub brush
Warm water
Soap
Caulking gun
Exterior-grade caulk
Removable weatherstrip caulk
Window insulation kit
Scissors
Thermal window fashions
Step-by-Step Guide to Window Insulation
Step 1: Inspect Your Windows
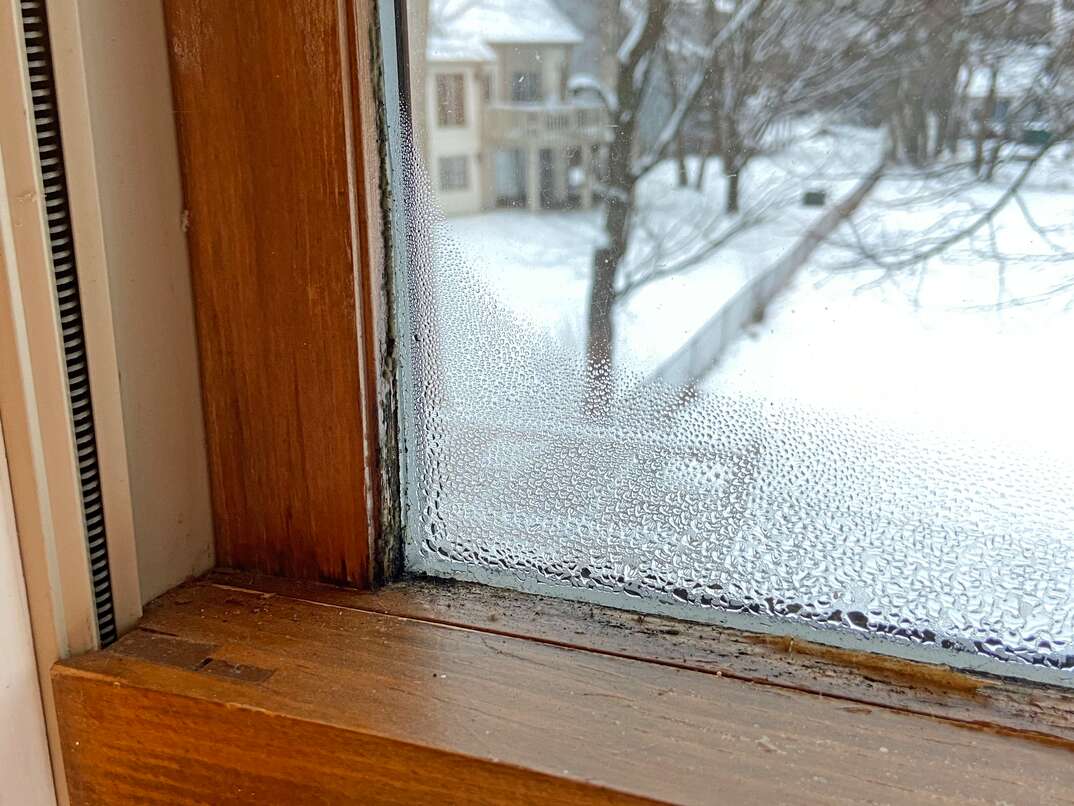
If your windows don’t fully close and seal, they can let moisture and cold air into your home while letting warm air out. Locks and latches can deteriorate over time, so open, close, latch and unlatch your windows to make sure they’re in good working order. Clean and lubricate any sticky latches and locks, and replace any broken or defective ones.
The caulking seal around the outside perimeter of your windows — where the trim meets the siding — is another essential defense against moisture and air leaks. Inspect the condition of the caulking to look for any broken, brittle or missing portions. If there are, the caulking should be replaced.
Step 2: Caulk the Outside
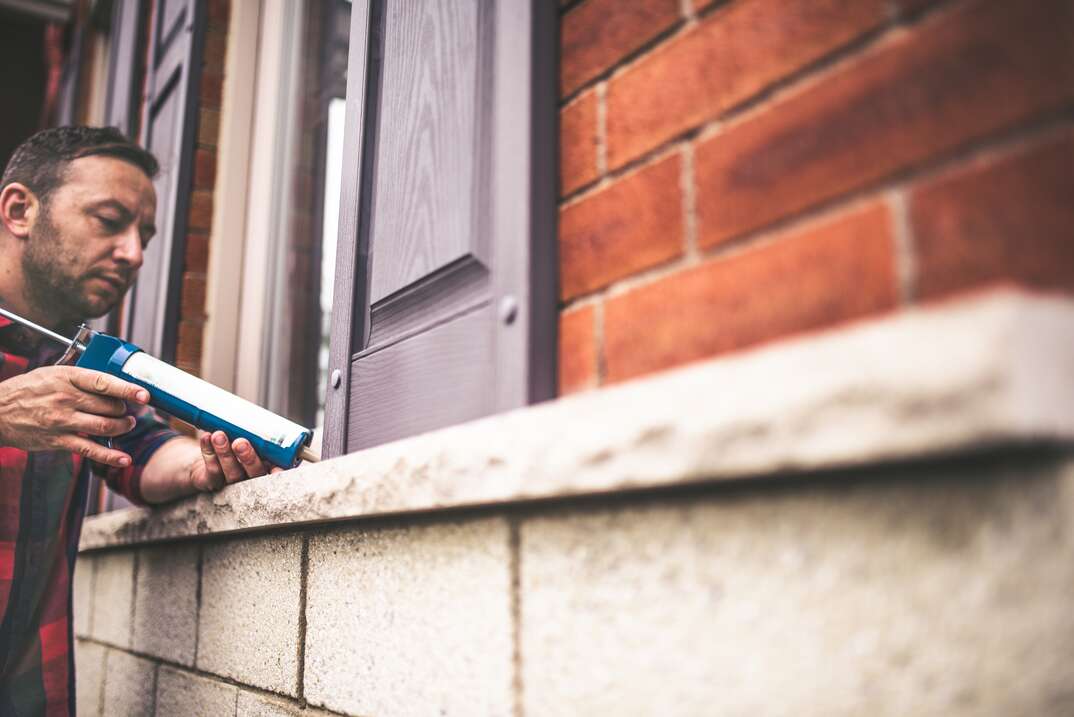
To replace the caulk, start by removing the old layer of caulking. Scrape it off with a putty knife or beveled scraper (like a 6-in-1 tool). Then, clean the area with a scrub brush and warm soapy water. Allow it to dry fully before you continue.
Load a tube of exterior-grade caulking (like “window-and-door caulking,” silicone, siliconized or polyurethane) into a caulking gun. Apply a fresh bead of caulking around the entire perimeter of the window trim. Refer to the manufacturer’s instructions for the recommended drying times.
Step 3: Weatherstrip the Inside
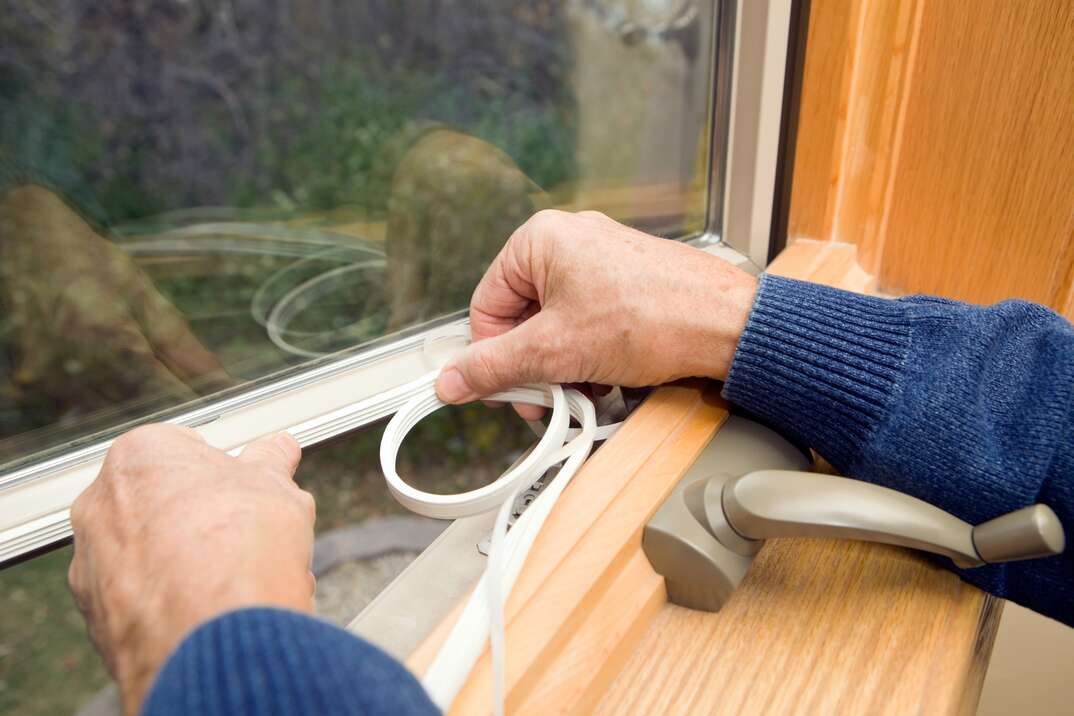
Now that you’ve sealed the outside of your windows with caulking, it’s time to add weatherstripping to seal off the gap where the sash (movable panes of glass) meets the bottom of the window frame.
There are several different types of window weatherstripping available, including:
Foam insulation tape: These are foam strips that compress inside the gap when the sash closes against the frame. Foam insulation tape can be easily cut to size with scissors, and they have a self-adhesive backing to secure them in place.
Tubular rubber gasket: This type of weatherstripping works in a similar way to foam insulation by compressing between the sash and the frame, but it uses a hollow rubber tube instead of a solid foam strip. Tubular rubber gaskets also have self-adhesive backing for securing the strips in place.
Felt: Felt strips are one of the most economical and oldest types of weatherstripping. They also work via compression. Some felt strips come with an adhesive backing, but they usually need to be stapled or nailed in place. Although they’re the most affordable, they generally don’t last as long as other varieties and need to be replaced every one to two years.
V-Seal: As the name implies, these are V-shaped plastic or metal strips that are placed inside gaps and spring open to seal them. They’re often available with self-adhesive backings.
Now that the bottom of the window is taken care of, seal the gaps on the sides of the sash with removable weatherstrip caulk. Load the tube of removable weatherstrip into your caulking gun and apply a bead along both sides of the sash where it contacts the window frame. At the end of winter, you can peel off the bead and open your window.
More Related Articles:
Skip the Fuss: Get a Window Insulation Kit
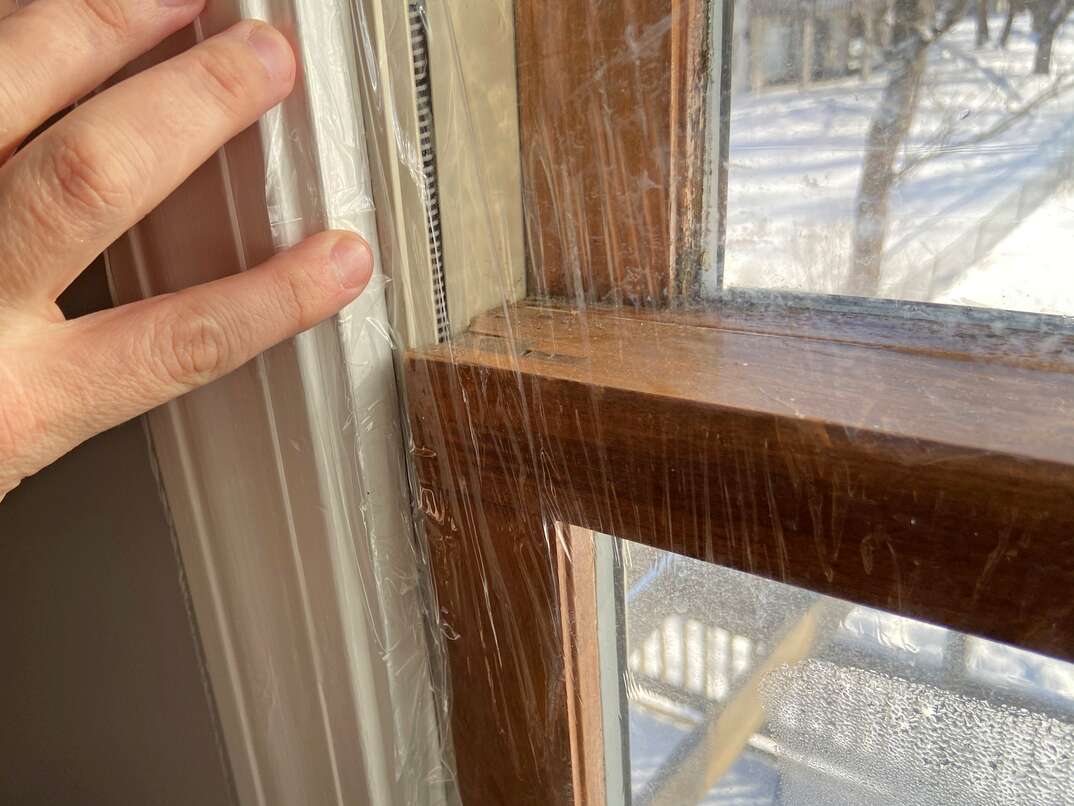
Window insulation kits are a popular option. They allow you to completely seal off your windows for the winter using heat-shrink plastic. To install them, place the provided double-sided tape to the outside perimeter of your window, cut the plastic to size and place it on the tape. Apply heat to the plastic with a blow dryer or heat gun until it shrinks and conforms to your window. Not only does this completely seal off the window to cover any air gaps that caulking and weatherstripping may have left behind, but it also adds additional insulation value to the window as well.
Or, Try Thermal Window Fashions
If you’d rather cover your windows with something more visually appealing than plastic, thermal window fashions are an excellent alternative. Options include:
Thermal curtains: These are heavy, foam-lined curtains specifically designed to add insulation value to your windows. Not only are thermal curtains useful for retaining heat during winter, but they’re also great for blocking the sun and retaining cool air during summer. To optimize their efficiency, hang them as close to the window as possible and overlap the seam where the two sides of the curtains meet. Some homeowners even install Velcro strips onto the seams to hold the two sides together and ensure they stay closed.
Dual-cell blinds: Dual-cell blinds are essentially two regular, single-cell blinds layered into one, and provide much greater insulation value than their single-cell counterparts. While they’re more expensive than thermal curtains, they’re an ideal choice if you prefer the aesthetic of blinds over curtains.
Consider Storm Windows
The name “storm window” may make it sound like this window’s primary function is to protect your home from storms, but they’re actually an excellent way to cover air gaps around your entire window. Often made of plastic or acrylic, they also contribute to soundproofing and will sometimes have UV-blocking qualities to provide year-round benefits.
They can be installed inside or out, and they can be custom-made to the exact specifications of your window. Interior “window inserts” are the easiest to install; simply press the insert into the frame.
Exterior storm windows require the extra installation steps of caulking and screwing them onto the window jamb, but they offer greater insulation value than interior inserts.
Winterize Wisely
Winterizing your windows is a great way to enhance your home’s energy efficiency. However, sometimes upgrading your windows to more energy-efficient models is the best solution. This is especially true if you’ve taken all the steps to winterize your existing windows but you’re still experiencing significant heat loss, if your windows are over 15 to 20 years old, or if your windows have single-pane glass. An investment in high-efficiency windows has the potential to pay for itself in a relatively short period of time.
View Plans in Your Area
Follow us
Popular

Apr 01, 2024

Apr 26, 2021

Get the latest news, tips and promotional messages, including special offers.