Follow us
How to Mount a Flatscreen TV to a Wall
By Michael Franco
December 11, 2020
There are many arguments for mounting a flatscreen TV to your wall rather than keeping it freestanding. For one, a mounted TV is often out of the reach of children and, therefore, less likely to tip and fall, and cause injuries. Mounting a TV can also protect it from fingerprints and other smudges.
This May Also Interest You: How to Fix a Hole in a Wall
Also, more and more often these days, people are streaming shows and movies from subscription services like Netflix and Hulu, eliminating the need for surface-cluttering cable boxes, DVD players and bulky entertainment consoles altogether. What's more, most TV mounts have tilt and rotation options, thereby reducing glare and allowing for more viewing angles than ever before.
Mount It Yourself
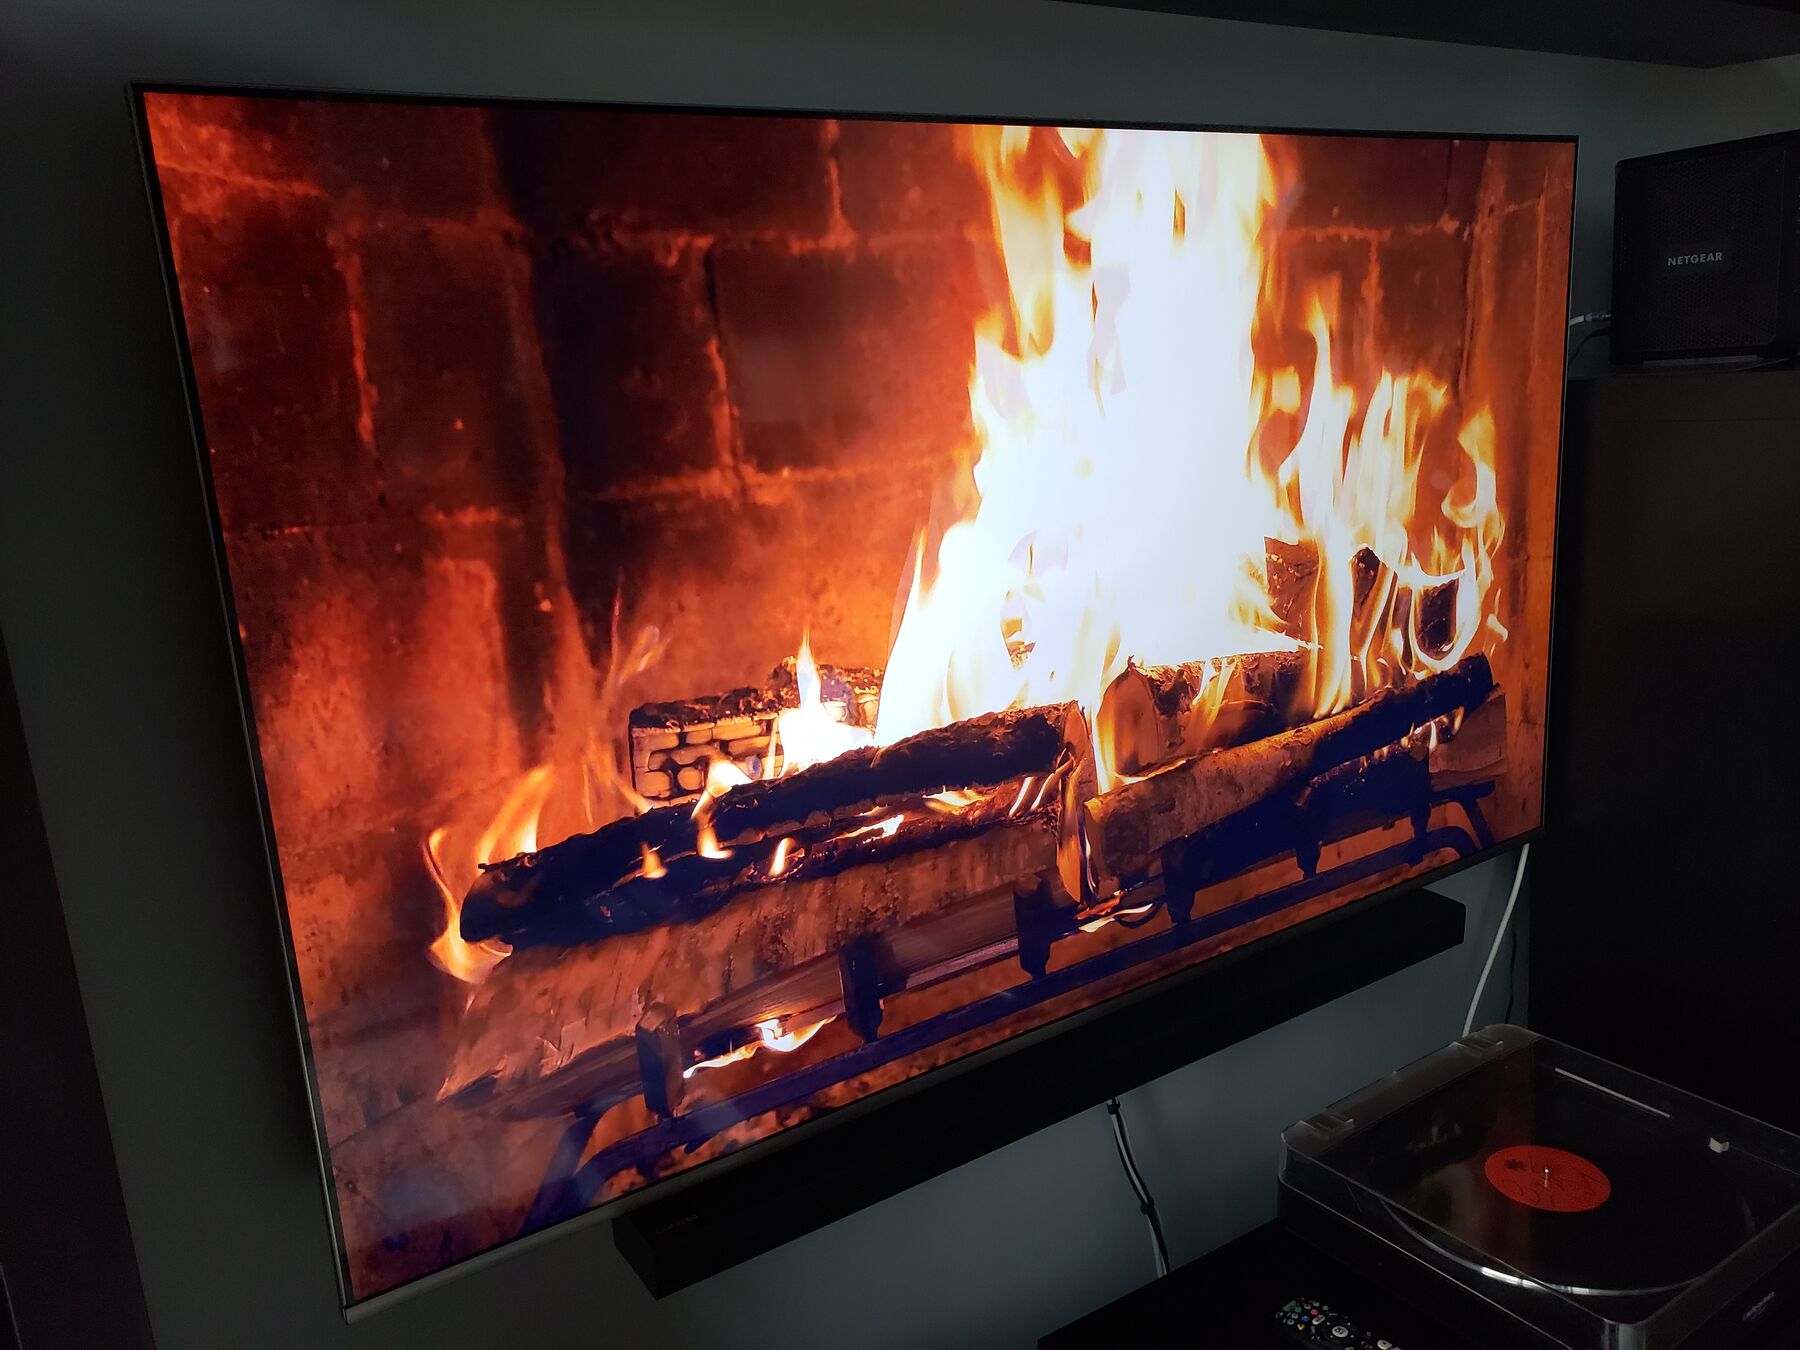
Mounting your flat-panel TV to the wall is a great way to streamline your entire living room, free up some extra floorspace and position the TV in a spot where everyone in the whole room can easily see the screen. Many companies will offer wall-mount TV installation for a price, but these fees are often steep — with a national average of around $270 — and can vary depending on TV size and structural considerations.
So, why pay extra when this task is one you can tackle yourself with relative ease? TV mounting isn't rocket science; in fact, with a few common tools, a little prep work and some basic know how, most any renter or homeowner can have a TV mounted and ready to watch in likely less than an hour's time — giving you time plenty of time left over to enjoy your favorite show while you admire your handiwork.
Before You Begin
But before you start drilling, you need to take into account some important considerations. Although it's this job is far from insurmountable, not mounting it correctly can cause permanent damage to both your TV and your wall. With a little prep work and knowhow, you can have your TV on the wall and you on the couch with now collateral damage to fix.
But before you can begin prepping, you'll need to be sure you've chosen the best mount for your specific TV, desired functionality and budget. You also need to make sure your TV can take a mount by looking behind it to see if it has holes into which you can attach a bracket. If it doesn't, you'll likely want to upgrade your TV, although there are shelves and systems out there that can accommodate older models with no mounting holes.
Find the Right Style for You
One of the most important things to consider when mounting a flat-panel TV on your wall is finding out what mount style best suits your needs. Although this may seem overwhelming (so many brands; so many models), there really are just three basic mount styles.
A low-profile mount (costing from $20-$100) is perhaps the simplest style. Although it positions the TV closest to the wall, it allows for no adjustment or tilting, so it's perfect if you have a smaller room and know exactly where you want to mount the TV. Tilting mounts ($50-$150), however, permit you to place a TV above eye level and adjust the angle to suit the viewing situation. Finally, full-motion mounts ($100 and up) give you the most angle flexibility and viewing versatility; with this style, you can pan, swivel and extend the TV, offering you the perfect viewing angle wherever you're sitting.
Gather Your Tools
Even the easiest DIY projects require the right tools for the job. You'll need a drill with a screwdriver bit, a level, a stud finder, painter's tape and, likely, a drywall saw. Trust us, you don't want to find yourself in the middle of this project only to find out you don't have the right tools. Save yourself a headache and make sure you have what you need before beginning.
Consider the Cords
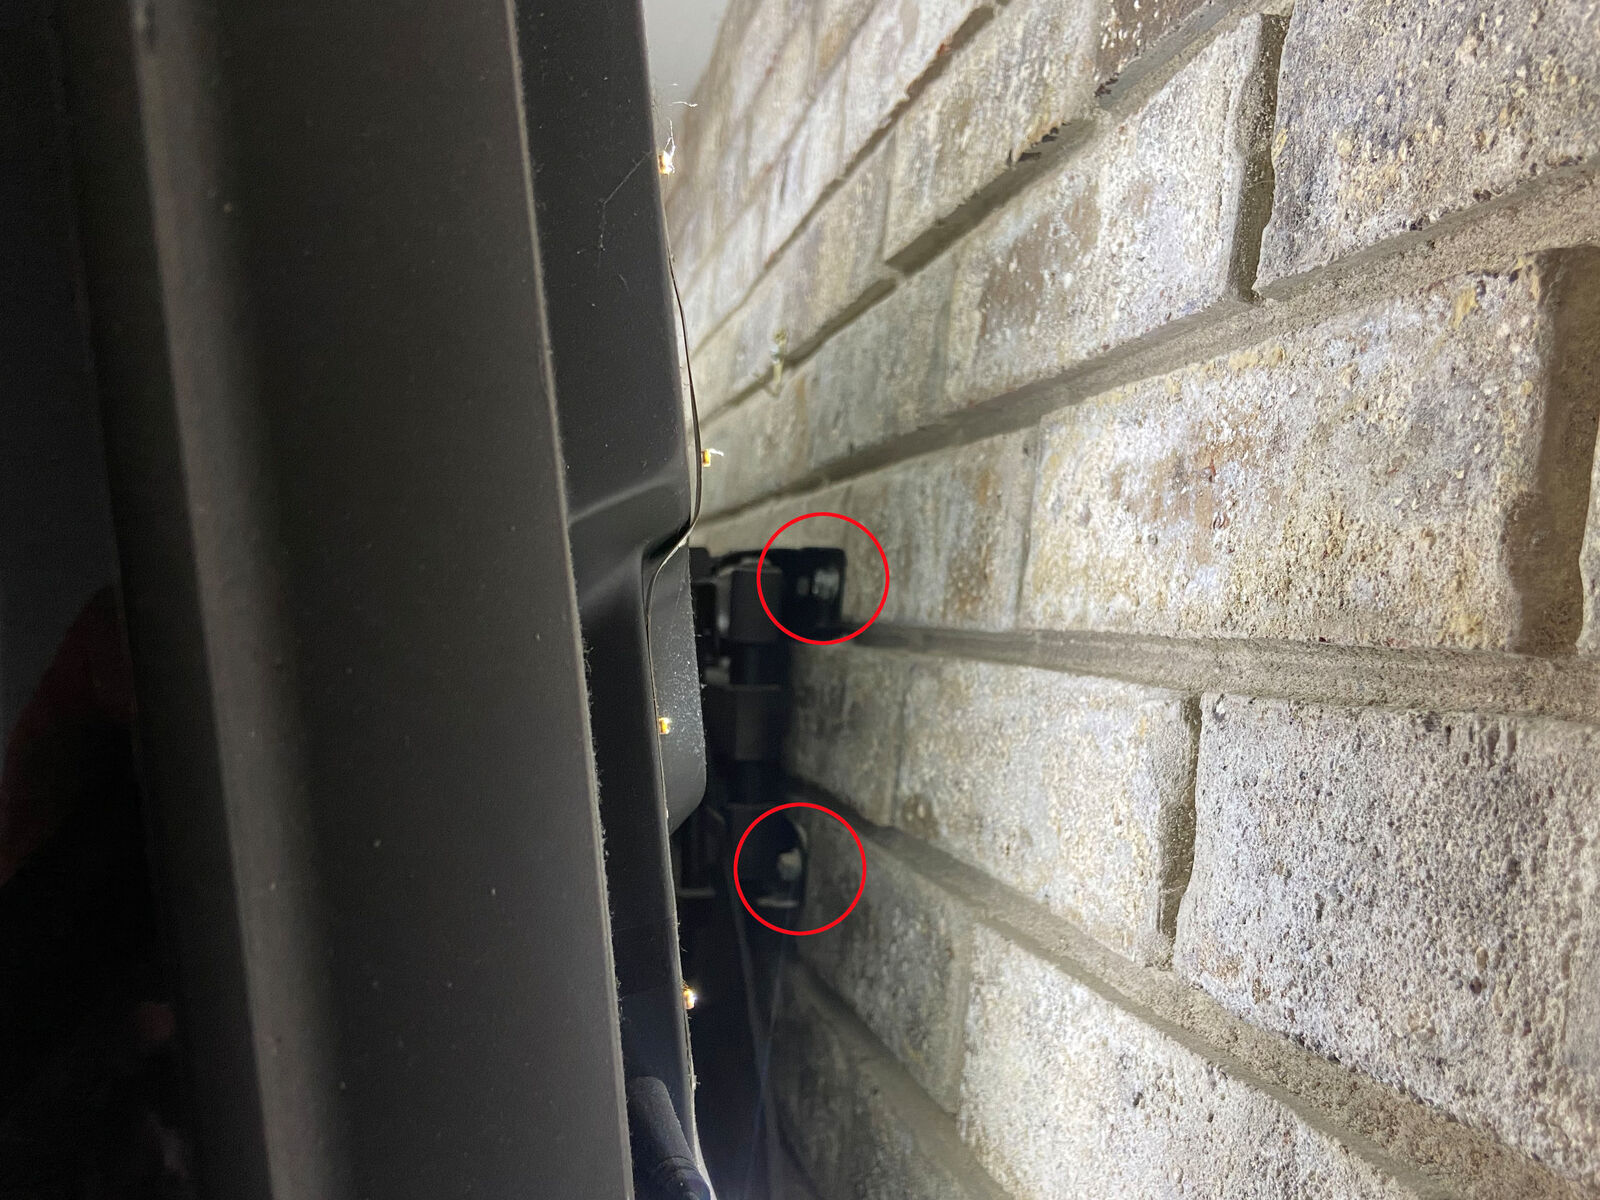
Although a mounted TV can do wonders for opening up some space in your living room, a jumbled mess of cords and cables can easily undermine the streamlined look, so it's important to consider your plans for concealing them.
One option is to purchase a cord-cover that will hide your cords against the wall. The sleekest option, however, is to cut a receptacle hole into the drywall and use a receptacle system like the PowerBridge, which lets you hide power cords by providing outlets where you need them, and conceal HDMI and sound cables in the wall. Although it's completely optional, a receptacle system makes for a very neat installation.
If you're going to go this route, follow these steps:
Find the least-visible spot for your receptacle hole, and make sure you're clear of any studs.
Then, lightly trace around the receptacle template with a pencil.
From there, use a drywall saw to cut along the traced line. You'll have to repeat these steps as you install the lower receptacle box within 6 feet of an outlet.
After that, snake your cables through the upper receptacle and pull them through the lower receptacle.
Then, it's as simple as connecting the cables to your power source.
There are other receptacle solutions available apart from the PowerBridge brand, so do your homework and find a trustworthy one that meets your needs.
Locate the Studs
Before you begin, it's also crucial to determine whether your wall can bear the load of a flat-panel TV. Let's face it: Even the slimmest TVs are pretty heavy. A 32-inch flatscreen TV can weigh anywhere from 20-30 pounds, while a 60-incher can weigh as much as 100 pounds.
Because of this weight issue, it's essential that you anchor your TV to a stud. Use a stud finder to determine where on your wall you can hang the TV. Once you find the stud, mark it with some painter's tape. Don't make the mistake of skipping this step and anchoring directly into the drywall itself — the anchors won't hold and you'll likely end up permanently damaging your wall and TV.
Find the Right Spot
Although there's no "correct" spot for a mounted TV on the wall — except, again, making sure you anchor it to a stud — it's important to consider a few things as you choose a spot. You may want to consider things like the size of the TV and the size of the room. Even though it mostly comes down to personal preference, mounting a TV too high is a common mistake, and could lead ultimately to a sore neck and strained eyes. Putting the TV at eye level (or even a little lower) is a safer bet.
Run the Drill
Once you've determined the best spot for your TV, drill your pilot holes. Pilot holes are the small holes where you'll drill your mounting screws. Pilot holes are generally 1/8 inch smaller than the mounting screws. Place the mount up to the wall and, using a level, make sure the mount is straight. Make marks with a pencil where you'll drill your pilot holes. From there, remove the mount and drill your marked pilot holes.
Get Attached
After drilling your pilot holes, it's time to start the process of attaching the mount (and the TV) to the wall. Follow these steps:
Hold the mount back up to the wall, align it with your pilot holes and screw it to the wall using the mounting screws.
Once you've done this, attach the mounting plate to your TV; first you'll need to first make sure that you've removed the stand.
Then locate the attachment holes on the back of your TV; sometimes, these holes are covered by plastic or already have screws in them, and if so, you'll need to remove them.
Once you find the holes, attach the mounting plate with the hardware that came with your mount.
When the mounting plate is on your TV, you can carefully lift and attach your TV to the wall. (Because every mount is different, it's important for you to consult the instructions that came with your mounting hardware before you attempt to attach it.)
More Related Articles:
Test it and Rest it
Now that the TV's attached, all that's left is to test it for stability and functionality. You'll want to make sure the TV feels secure, and that it turns and lifts appropriately and with ease ( if you have a full-motion mount, that is). You'll also want to try turning the TV on and watching from a few angles and positions around the room, so you'll know if any of your existing furniture or seating should be adjusted for optimal viewing.
Once you've verified that the TV is secure and in working order, it's time to clean up your tools and packaging, checking to make sure you haven't left any extra screws or bolts lying around. Recycle the packaging if possible and, if you're the organized sort, set aside the mounting instructions to save in a folder along with other household electronic and utility manuals. That way if ever you move or need to mount it in a different location, you'll be ready.
And that's all there is to it! Time to sit back, relax, and enjoy the fruits of your labor. By not calling in the experts for this job and opting to mount it yourself, you'll have saved money, made your space more visually appealing and improved the TV-viewing experience for the entire family. Knowing this will make watching TV after a long day all the more satisfying. And, who knows? It may also make future household installation tasks seem less daunting.
View Plans in Your Area
Follow us
Popular


Apr 01, 2024

Apr 26, 2021
Get the latest news, tips and promotional messages, including special offers.