How to Refinish Hardwood Floors: 9 Steps, Start to Finish

Hardwood is an attractive and durable choice for home flooring that can hold up under constant abuse while still managing to look good. But nothing lasts forever, and every seven to 10 years, even hardwood needs refresh. A professional refinishing can be pricey — up to $4,000 at the high end. So if you’re not prepared to spend your hard-earned cash on your hardwood floor, you can opt to spend your time instead of spending your money, and do the work yourself.
This May Also Interest You: Here's How to Clean Your Hardwood Floors for That Flawless Shine
If you decide to go the DIY direction — which could save you hundreds or even thousands of dollars — this nine-step overview can walk you through hardwood floor refinishing process:
Step 1: Gather What You’ll Need
- A soft-bristle broom
- A vacuum with a hardwood floor attachment
- A hammer
- Finishing nails
- Plastic sheeting
- Painter’s tape
- A pry bar
- A belt sander or a drum sander
- Sandpaper in 36- to 40-grit, 60-grit, 100-grit and 220-grit
- An edge sander
- A floor buffer with a fine-grit sanding screen
- Tack cloth
- Foam applicator pad
- Hardwood floor stain
- Cotton pads or paper towels
- Either water-based polyurethane wood lacquer or oil-based polyurethane wood finish
- A lacquer roller with a long handle and a quality paintbrush
Step 2: Prepare the Floor
- Sweep the floor with a soft-bristle broom to avoid scratching your wood floors.
- Vacuum the floor using a hardwood floor attachment, if your vacuum comes with one.
- Nail down any protruding nails with a hammer and secure loose floorboards with finishing nails.
Step 3: Prepare the Room
- Move all furniture and other household items, including all rugs or carpeting.
- Seal air vent covers to prevent dust from entering your home’s ductwork, and all doors to keep dust out of the rest of the house.
- Pull up any molding where the floors meet the walls, using a pry bar.
Step 4: Rough Sanding
This is where things can get expensive. Refinishing floors requires several kinds of sanders.
- Begin sanding your hardwood floors with either a belt sander or drum sander. Always wear safety goggles or a dust mask.
- Start with a coarser-grit sandpaper, 36 to 40 grit, then move to a medium, about 60 grit, and finally, end with 100-grit, fine sandpaper.
- Work in lengths of 3-4 feet at a time. Complete one pass with each type of sandpaper.
- For best results, replace the abrasive belt every 250 feet or so.
- Between rounds of sanding with the different-grit sandpapers, sweep or vacuum the floor to remove excess debris.
Step 5: Edge Sand the Corners and Small Areas
- Use an edge sander for getting to small spaces like closets, in corners or along edges where the larger sander can’t access.
- Follow the same process as with the belt or drum sander, going through three rounds of sanding, from coarser to finer grit sandpaper.
Step 6: Buff the Floors
This is an important final step for making your job look more professional. It also helps buff away any scratches from the other sanders.
- Use a floor buffer with a fine grit sanding screen.
- Let the buffer move in a sweeping motion to create a smooth surface on the floor.
Step 7: Clean Up the Dust
- After buffing, do a thorough job of sweeping and then vacuuming the floor.
- Afterwards, use a tack cloth, picking up any visible loose dust.
Step 8: Apply Stain
When staining hardwood floors, you can decide to change the color of your wood floors at this stage, based on your current color preferences and style of wood floor.
- Using a foam applicator pad, work in one small section at a time, moving in the direction of the wood grain.
- Check for extra stain and remove it as you go; cotton pads or paper towels can be used for this.
- Let the stain dry completely.
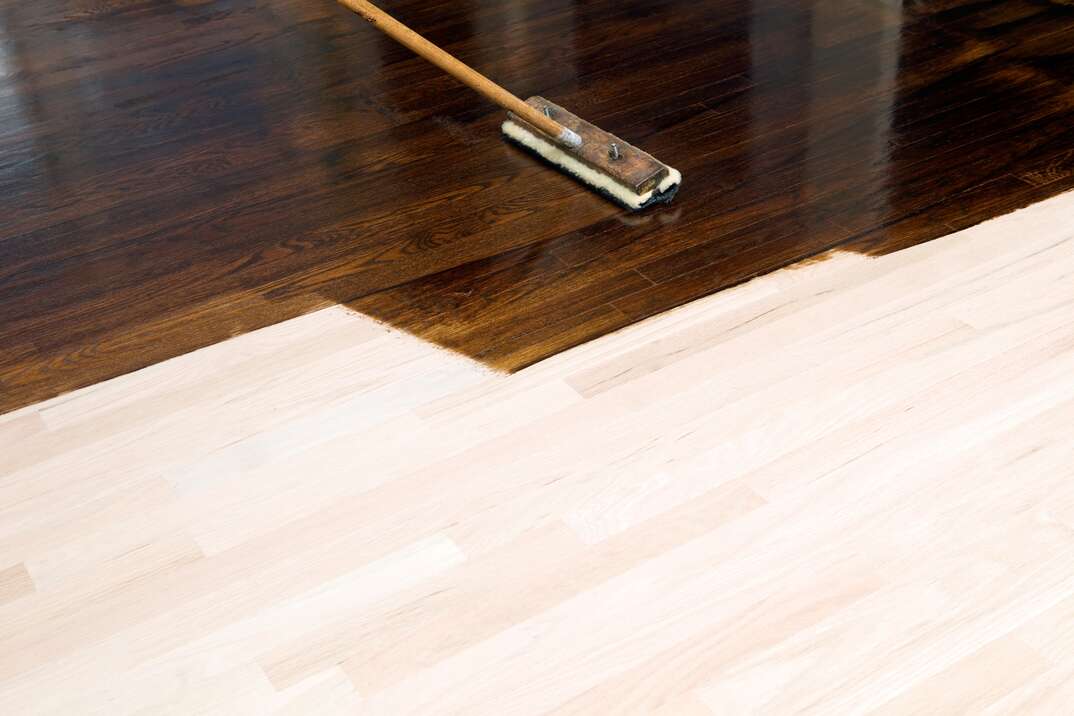
Step 9: Apply Finish
The two most common wood finishes available are water-based polyurethane wood lacquers and oil-based polyurethane wood finishes. Although water-based finishes are less noxious, they dry faster, which makes application a challenge. Oil-based polyurethane finishes have the advantage of drying more slowly, but they also require respirator use during application.
- Apply finish smoothly and evenly with the roller and paintbrush.
- Apply three coats for oil-based stains and four coats for water-based stains.
- After each coat dries, lightly sand the surface with 220 sandpaper.
- Wait 24 hours before applying the second coat.
- Reattach the baseboard molding you removed earlier.
Since we’re all home now more than ever, being prepared for unexpected home repairs with a plan from HomeServe is important. Having a plan in place gives you the peace of mind knowing that you can simply call our 24/7 repair hotline for covered breakdowns. See what plans are available in your neighborhood.