Step Up Your Storage Game by Installing an Attic Ladder

Who doesn’t need more storage space? Given the recent rise in the minimalism and decluttering movements, people all over are simplifying and paring down their living spaces in new and inventive ways. But the simple truth is that there are some items we want to hold onto yet don’t need for daily living. One of the best methods for streamlining and decluttering your home without getting rid of items you want to keep is to maximize your storage space. In other words: Shove it up in the attic.
This May Also Interest You: DIY Tips for Organizing Your Garage
Depending on your home, an attic is typically an optimal space for storing many items, but attics can often be difficult to access — unless you have an attic ladder installed. A retractable attic ladder allows easy access to what is likely your most neglected storage space. If your attic doesn’t have an attic ladder, don't fear. Adding a ladder or attic stairs is a surprisingly simple weekend do-it-yourself project.
If you’re looking to take your storage game to new levels, take the following steps for a successful attic ladder installation.
Step 1: Find the Right Ladder For Your Home
Once you decide to install an attic ladder, you’ll first need to determine what type of ladder will best suit your needs. Attic ladders can be made from several materials. including wood, steel and aluminum. While all three types have their benefits, experts agree that, for most DIYers, aluminum ladders are the best choice. They’re lightweight, durable and also easiest to install. Furthermore, aluminum ladders last for years and aren’t as susceptible to the humidity and temperature fluctuations that can affect wooden ladders.
Attic ladders also come in a variety of designs. For example, some attic ladders have shallow steps instead of ladder-like rungs. Some attic ladder designs fold out, while others “telescope” out more like a traditional extension ladder. While the type of attic ladder you choose comes down largely to personal preference and budget, practical concerns should be considered, as well. For example, if you know you’ll be carrying heavy objects up and down the ladder alone, consider installing an attic ladder with a handrail.
You'll also want to make sure there’s enough space on the ground for the ladder to be fully extended. Dimensions vary by the model of attic ladder you buy, so be sure to measure the distance from your ceiling to the floor to find out what size you’ll need.
Step 2: Cut Out Access Point
After determining your preferred attic ladder style and size, you’ll then need to cut a hole for your ladder’s access point. You might already have an access hatch of some kind. If that’s the case, you’ll likely need to expand what’s already there. If not, you’ll need to cut a new hole.
Attic ladder kits usually call for a hatch that’s 25 inches by 54 inches, though wider is often better if your space allows for it. Either way, refer to the manufacturer’s guidelines on the ladder kit you purchase.
Measure out the dimensions of your access hatch and mark them with a pencil using a speed square, or you can snap chalk lines if you have a chalk box available. You'll want to make sure your hatch is located between your attic joists, so find them either using a stud finder or drill a long screw into the ceiling from below and locate it in the attic to find the spot where you want the hatch. After measuring, cut through the ceiling using a drywall knife and cut any joists with a circular saw followed by a handsaw to clear the space.
Step 3: Frame Your Opening
After you cut out your access hatch, you’ll need to frame the space so that it can accept the stair kit. To do so, create a box on the attic side of the ceiling using wood boards that match the size of your existing joists (usually two-by-sixes or two-by-eights).
Two boards will be installed perpendicular to the existing joists to create a span that's identical to the staircase frame's length, and one will run parallel to the existing joists to shorten the span between them to be equal to the width of the frame. You can double up these boards for extra strength.
Fasten the new boards to your existing joists using nails and joist hangers. The finished box should match the size of your attic stair frame. Next, attach two 1-inch by 3-inch temporary support boards across the short ends (width) of the opening on the ceiling side of your project. These boards should protrude into the opening about a quarter-inch on each side. This will create two ledges that will hold your stair frame as you install it.
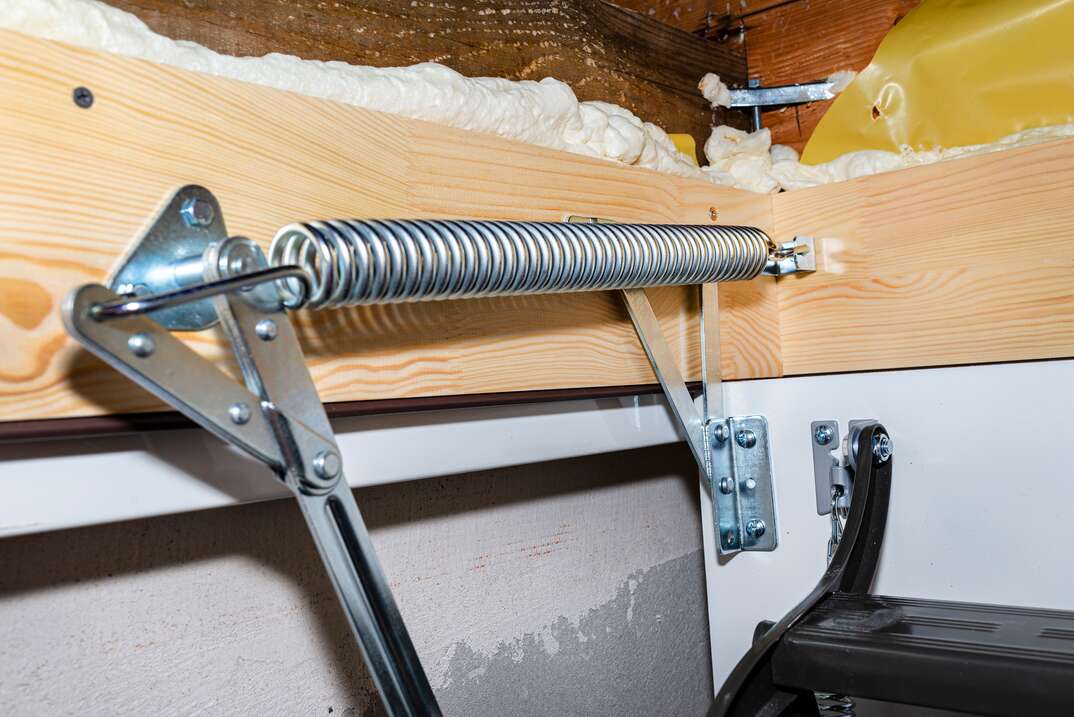
Step 4: Attach the Stairs
To install the stair kit, be sure to have someone in the attic to whom you can pass the stairs and frame. Lay the frame with the stair side lying upwards and rest the solid side of the stairs (the door) onto the ledges you built. Make sure the door swings in the direction you want it to open.
After resting the stairs on the temporary supports, check the swing of the door panel and make sure that it closes without binding, and closes flush against the frame. If not, make the necessary adjustments.
Once the ladder is in place and working smoothly, simply drill it into the frame.
Once you attach your ladder and test it for functionality, trim the length of the ladder to the exact size needed and install the attic ladder feet. Although installation for these differs by manufacturer, ensure the foot pads touch the floor and provide an even surface for the ladder to rest upon.