How Much Does It Cost to Install Light Switch Dimmers?
Dimmer switches have been in use for decades and have many benefits over traditional light switches. Customization and personalization are key for today’s homeowners, and that includes lighting:
This May Also Interest You: Everything You Need to Know About Light Switches and Dimmers
Turn the lights down and save energy to set the mood, or turn the lights up to brighten up a room. Today’s technological advancements have brought us smart dimmers that allow integration into whole-home automation systems for the ultimate user experience.
What Safety Precautions Do I Need To Know?
Working safely with electricity requires you to stay refrain from touching conductors until they are powered off. In this case, that will be the wires in the wall that connect to your light switches. To safely work with any wires, you’ll need to turn off the electricity to them via your breaker box.
Your home has a breaker box that can turn the electricity off entirely, or through individual circuits. Find the breakers that control the wall switches you’re working on and turn the breakers to the off position. Always turn off the power to the switches you’re working on in your breaker box before you turn a screw. A quick test of the light switch in question will confirm that you’re safe to move forward when the light doesn’t turn on.
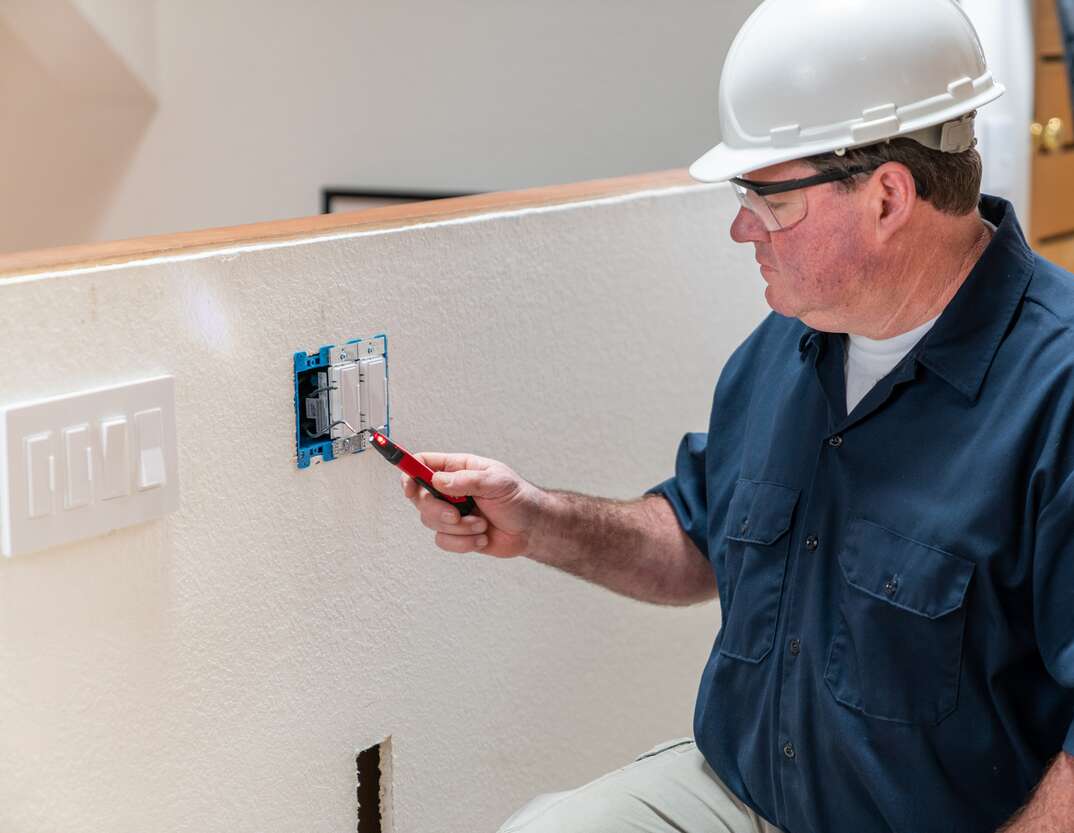
What Tools Do I Need to Install a Dimmer Switch?
- Slotted and Phillips-head screwdrivers
- Wire cutters
- Wire strippers
- Needle-nose pliers
- Voltage tester
- Electrical tape
- Wire nuts or screw caps
- Dimmer switches
- Optional wall plates
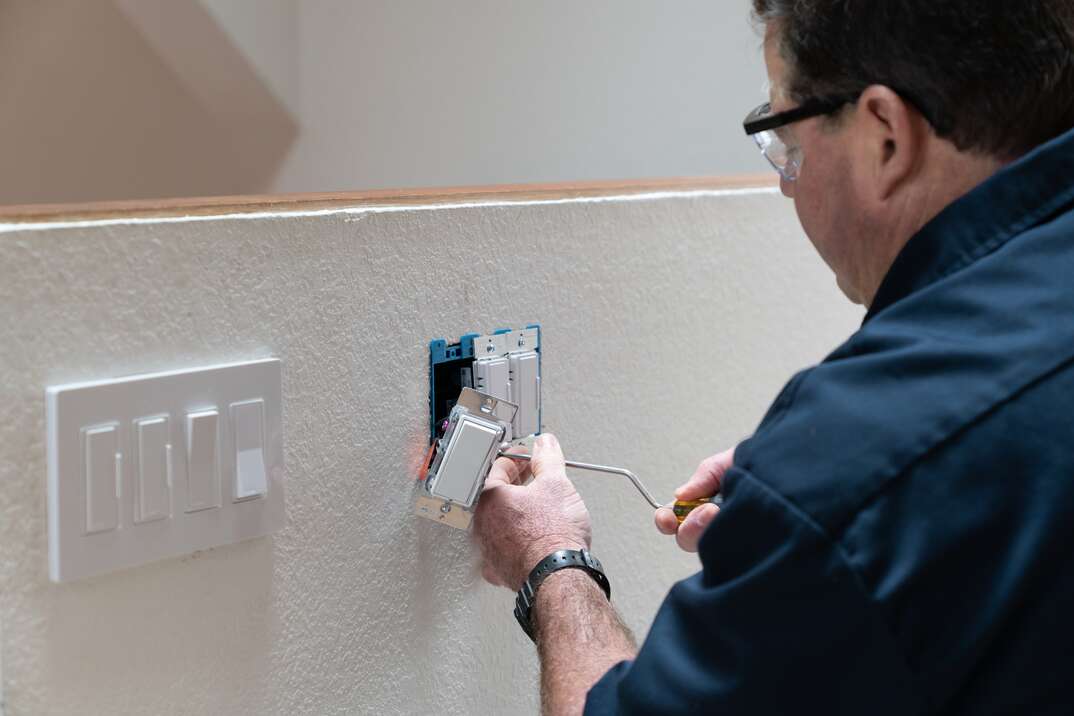
How to Install a Dimmer Switch With Only Two Wires
A two-wire dimmer switch is a single-pole switch upgrade. A single-pole-compatible dimmer is meant for one light fixture. This type of switch has two wires, one being a bar capper wire that is connected down the line as a ground wire.
To install this type, you’ll need to turn the breaker off for the light switch you want to change. Confirm that it’s off by flipping the switch on and verifying that the light doesn’t come on. Then follow these steps:
- Use a screwdriver to remove the screws and current faceplate, and then remove the screws holding the switch to the wall box.
- Carefully remove the switch from the wall.
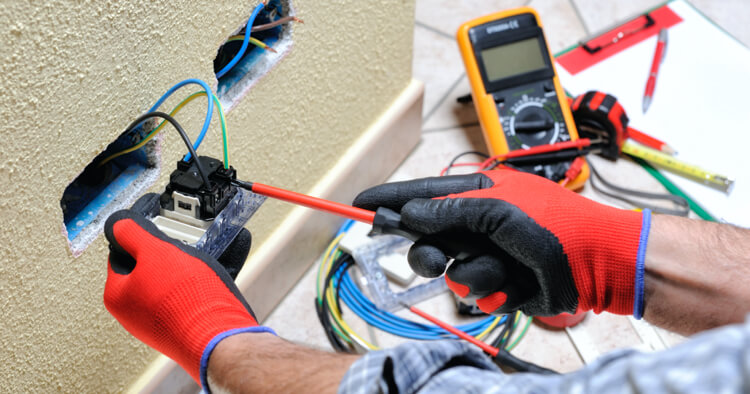
- Remove the wires from the light switch.
- Connect the green wire from the dimmer switch to the bare copper ground wire and twist the two wire ends together, using pliers if needed. You may need to cut and strip the wire ends to allow you to twist the ends of each together, and then screw on a wire nut for a proper connection.
- Connect the dimmer switch to the house wiring as you did with the ground wire. The dimmer-switch wires will usually be black; the house wires may be red, white or black.
- Use a wire nut on the ends of each wire connection as before, and be sure there’s no exposed wire below the wire nuts. If there is, remove the wire nut, trim the wire, and then re-twist the connection together and, finally, re-cap the ends.
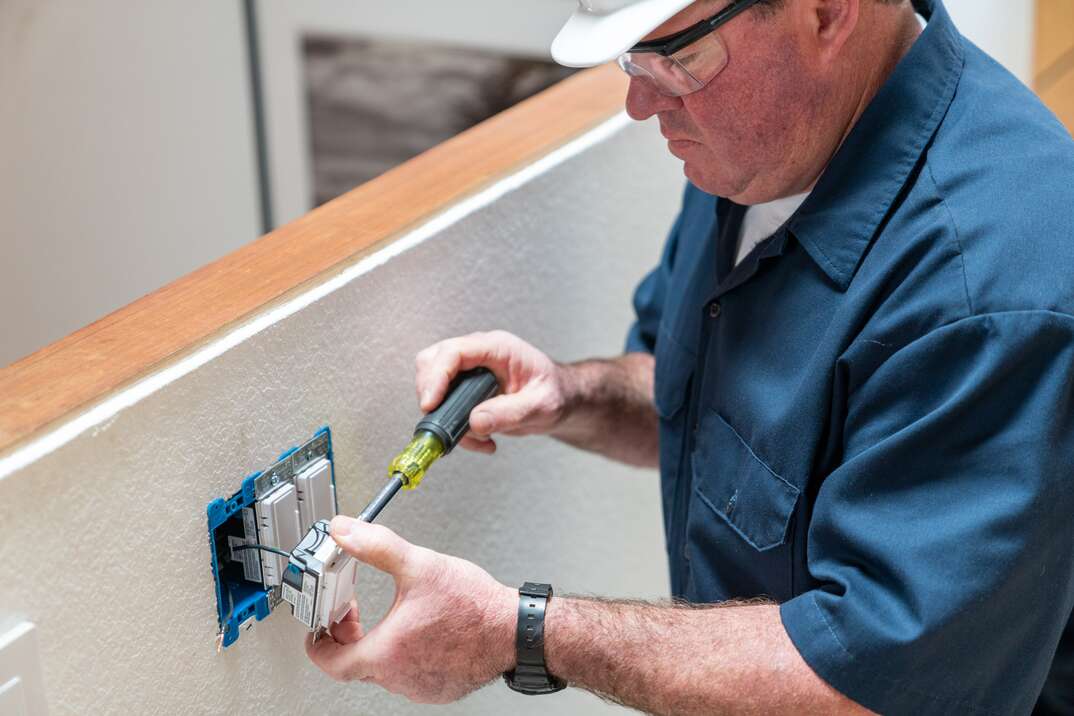
- Carefully place the dimmer switch into the wall box and mount it with the appropriate screws.
- Install the faceplate as directed by the instructions that came with the new dimmer.
How to Install a Three-Way Dimmer Switch
Three-way dimmer switches are as straightforward as the single-pole version, except that you have one additional wire to connect. That third wire is the common wire and will be connected to a screw on the light switch; it’ll be a different color or bear a label designating it as “COMMON.” Follow these steps:
-
Use a screwdriver to remove the screws and current faceplate; then remove the screws holding the switch to the wall box.
-
Carefully remove the switch from the wall.
-
Tag the common wire with tape, mark it or otherwise make it identifiable before disconnecting it from the light switch.
-
Remove the wires from the light switch.
-
Connect the green wire from the dimmer switch to the bare copper ground wire in the wall, twisting the two wire ends together with pliers if needed. You may need to cut and strip the wire ends to allow you to twist the ends of each together, and then screw on a wire nut for a proper connection. You only need to strip a half-inch to three-quarters of an inch of wire insulation to make the connections.
-
Use a wire nut on the ends of each wire connection, as you did before, and be sure there’s no exposed wire below the wire nuts; if there is, remove the wire nut, trim the wire, and then re-twist the connection together and, finally, re-cap the ends.
-
Make the connection between the black dimmer wire and the common wire you have tagged or marked.
-
Connect the remaining house wires and remaining dimmer wires.
-
Carefully work the wires and dimmer switch into the wall box, and replace the mounting screws.
-
Attach your faceplate per the instructions that came with the new dimmer.

Once everything is tucked into place and securely mounted, turn the power back on to the circuit at the breaker box and put your dimmer to the test. Turn it on, adjust the lighting and then turn it off.
What to Consider When Choosing a Dimmer Switch
The prices for smart dimmers have become affordable for all but the fanciest models. In this category, you’ll find dimmers with light sensors, motion sensors, nightlights, programmable lighting scenes and dimmers that can connect to your home network via cable or wirelessly.
Be aware that, with more capabilities, you may need more infrastructure for the installation, though not as much as you might think. For example, some dimmers may require a smart speaker to integrate into a system. The requirements for each brand and model are readily available for you to compare online and allow you to customize a system for your needs.
The Benefits of Installing a Dimmer Switch
Instead of a bank of light switches and off-white knobs commonly referred to as “wall warts,” you have a contemporary bank of flat, programmable dimmers with sensors and LED lights that blend in with the room. These dimmers automatically turn the lights on and off when people enter and leave the room, and keep the lights off if enough ambient light is already available. Remote control through an app on your smartphone gives you command of the lighting in all rooms as well as real-time status. Did you forget to turn the lights off in the media room? No problem, check your phone and hit the power button on your screen.
Ready to upgrade your light switch? The good news for you: This home-improvement project is a beginner-level task that you can complete on your own. With knowledge in hand and a few simple tools, you can have as much lighting control as you desire.
Upgrade Your Fluorescent Lights
Fluorescent lights do not play well with dimmers. Just FYI. If you have fluorescent lights in an area you want dimmer control in, it may be time to upgrade your light fixture. Fluorescent lights with dimmer control flicker due to constant voltage changes, making them less-than-ideal for the project. There are several excellent lighting upgrades available for you to consider with some additional research. Upgrade the fixture before you upgrade the switch. With that in mind, let’s take a closer look at your home lighting.
More Related Articles:
Dimmer Switch Upgrade: Choose Wisely
First, you’ll need to be sure you buy the correct type of dimmer for your application. Make note of the number of switches that control the light fixture you want the dimmer for, as well as the kind of light bulb that fixture uses.
Home lighting circuits come in two forms: single-pole and three-way. You’ll commonly find single-pole circuits and switches inside the doorway of bedrooms or bathrooms: one switch per light fixture. Three-way circuits and switches are commonly found at both ends of a stairway or a kitchen area with multiple entrances, and allow control of one light fixture from two switch locations.
Put simply: Single-pole lights need single-pole dimmers and three-way lights need three-way dimmers. Dimmers are configured and labeled for each kind of circuit, so you should easily be able to find the type you need. A few dimmers are configured to work with either circuit type and will be labeled accordingly.
Next, match the dimmer to the type of bulb the fixture uses; these types include:
- LED dimmers
- Incandescent dimmers
- Halogen dimmers
Once you match your dimmer to your circuit and bulb, you can shop for dimmers with the attributes and features that you want, such as appearance, smart control, integration and WiFi connectivity. You’re limited only by your budget and imagination. A quick search online will reveal the availability of dimmers ranging from basic to smart in both big-box stores and online marketplaces.
Dimmer Switches Create Ambiance
This project is a strong return-on-investment prospect for home improvement because attractive lighting can have a major impact on the ambiance of a room. The wall plates and controls help bring rooms into the 21st century versus a basic light switch, and your options for matching the lighting with a space’s decor are many. Then there’s the bonus of saving money on your electric bills.
Since we’re all home now more than ever, being prepared for unexpected home repairs with a plan from HomeServe is important. Having a plan in place gives you the peace of mind knowing that you can simply call our 24/7 repair hotline for covered breakdowns. See what plans are available in your neighborhood.